
Is this Birds of War Egg Siege guide advice final?
No. It is a launch-period framework based on the official game structure and should be re-checked after balance updates.

Birds of War Egg Siege guide: learn how to raid nests, carry eggs home, defend your score, rotate with teammates, and survive contested aerial routes.
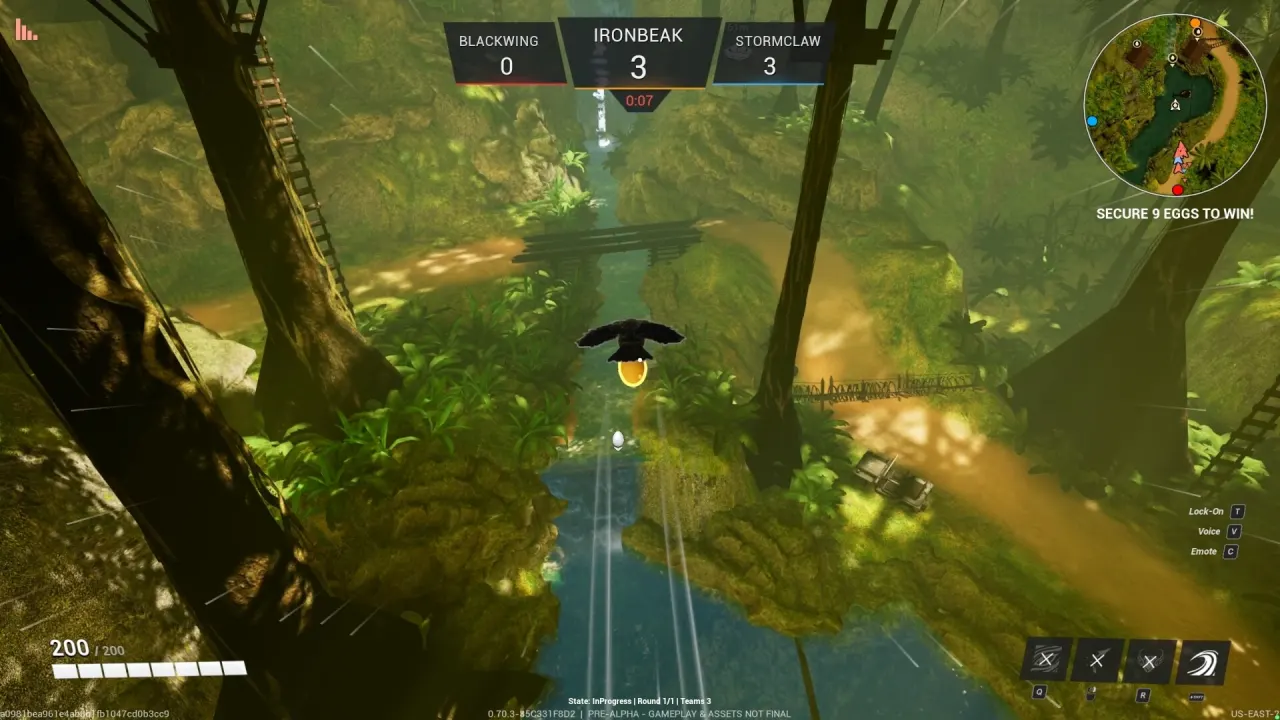
Match footage for reading nest pressure, carries, and returns.
~6 min read
Sponsored
This Birds of War Egg Siege guide page is a practical reference for Steam Early Access matches. It separates confirmed game structure from tactics that remain patch-sensitive, so you can make a useful decision without treating a short launch window as permanent truth.
| Fact | Detail |
|---|---|
| Platform | Steam (Windows PC) |
| Format | Online 3v3v3 aerial PvP |
| Core objective | Raid nests, carry eggs, and defend your own |
| Launch birds | Crow, Hummingbird, Shoebill, Pigeon, Eagle, Owl, Seagull |
| Launch maps | Highrise, Arctic, Vietnam, Coliseum, Forest |
| Modes | Egg Siege / Conquest, TDM, FFA, Infected |
| Status | Steam Early Access — July 22, 2026 |
| Price | $9.99 |
Birds of War Egg Siege, also referred to in official material as Egg Conquest, is the flagship 3v3v3 objective: raid enemy nests, bring eggs home, and finish with more eggs than the other teams. The important lesson is that stealing is the middle of the loop, not the end. A team earns value by turning a nest opening into a protected return.
Every raid creates two simultaneous questions. Can your group reach the target nest without losing home defense? And if an egg is picked up, which player owns the exit while the others deny pursuit? Answer both before the first hit. The team that only plans the pickup usually feeds the third team a free interception.

| Phase | Team job | Failure to avoid |
|---|---|---|
| Approach | Scout defenders and identify vertical exits | Entering all from one visible angle |
| Opening | Force attention away from the egg | Using every cooldown on a single knockout |
 Pickup | Carrier commits to the safest known lane | Stopping to chase after taking the egg |
| Return | Escorter blocks or distracts pursuit | Allies flying directly behind the carrier |
| Reset | Re-establish home defense | Celebrating at a weakened nest |
A carry lane should have a carrier line, an escort line, and a fallback. If all three birds occupy the same airspace, one intercepting enemy can disrupt the entire squad. The next section explains how to choose whether to start that raid at all.
Defend when an enemy is already near your egg, when your own team has no clean exit, or when the target nest is fully staffed. Raid when you have seen defenders commit elsewhere, when an ally can create a distraction, or when a known vertical lane lets the carrier leave before the target can regroup.
Do not turn this into a rigid timer. In three-team play, a quiet nest can be bait and a busy nest can be a chance. Look for information: who is visible, who is carrying, and which direction the third team is travelling. A delayed raid is often stronger than an immediate one because it makes opponents spend their attention first.
Leaving without an egg can preserve the next objective window. If the route closes, say “reset” early and climb away together. The strongest Egg Siege teams are not the ones that never retreat; they are the ones that do not donate three separate knockouts after the first plan fails.
Protecting a carrier does not mean stacking on top of them. An escort should be offset: high enough to see an interceptor, wide enough to become a second target, and close enough to force a pursuer to choose. The defender at home should also know the return direction, because a successful carrier may arrive followed by enemies who want to reverse the steal.
Use combat to buy route time. A hit, body block, distraction, or threat is useful when it makes a pursuer miss the carrier’s line. A long duel beside the target nest is rarely useful after pickup. The carrier’s job is to leave, not prove they can win a fight while holding the objective.
| Pursuit problem | Escort response | Carrier response |
|---|---|---|
| One pursuer from behind | Force them to turn or respect your angle | Keep the planned exit |
| Two enemies converge | Call the collapse and make space | Use the fallback lane, not a tighter corner |
| Home nest threatened | Return only if the carry is already safe | Do not circle outside your own nest |
| Third team appears | Break line of sight and disengage | Prioritise survival over a risky finish |
The return can draw every team to your nest. Rebuild positions immediately rather than assuming the objective is over. That same discipline carries into combat decisions.
Matched by build plan, shared topics, and guide progression — not random related links.
Birds of War is young enough that a strong-looking play can be a reaction to one lobby, one map, or a patch that has already changed. Use role labels and the objective loop as the stable layer; treat exact damage, cooldown, health, and route claims as provisional unless a current official note confirms them. That distinction matters more in a 3v3v3 game than it would in a duel, because a third team can punish both sides after a seemingly winning exchange.
The practical test is simple: ask whether the advice still works when another team enters the fight. A route is good when it gives the carrier an exit, a defender a sightline, and the flexible player a decision. A fight is good when it protects an egg, stops an egg, or creates safe space for the next move. If it does none of those things, it is probably entertainment rather than match progress.
| What you notice | Reliable response | What not to assume |
|---|---|---|
| A patch changes a bird | Re-check the official patch note and play the objective role first | That an old tier label remains correct |
| A teammate calls for help | State whether the threat is at nest, on route, or already escaping | That everyone can see the same target |
| Two teams are fighting | Approach with an exit and decide whether to contest or steal | That the first knockout ends the danger |
| A tactic works once | Repeat it across maps and enemy roles before calling it standard | That one clip proves a universal route |
Proximity voice makes information valuable and risky. Calls such as “carrier leaving nest,” “defending home,” or “third team above” tell allies what decision is required. Long explanations reveal position and arrive too late. Keep the call tied to the egg, the route, or the next regroup.
That information discipline leads directly into the next decision: open combat guide and apply one decision at a time.
No. It is a launch-period framework based on the official game structure and should be re-checked after balance updates.
Yes. It is a $9.99 Steam Early Access 3v3v3 aerial PvP game from HexNest Games. Open the Steam listing.
No fixed composition is required for the guide to help. The useful baseline is still three jobs: create pressure, protect the objective, and preserve an exit.
Continue with combat guide so the next match has one concrete objective to practise.
Matched by build plan, shared topics, and guide progression — not random related links.